Elecfreaks · micro:bit Series
IoT & Environmental Data Science
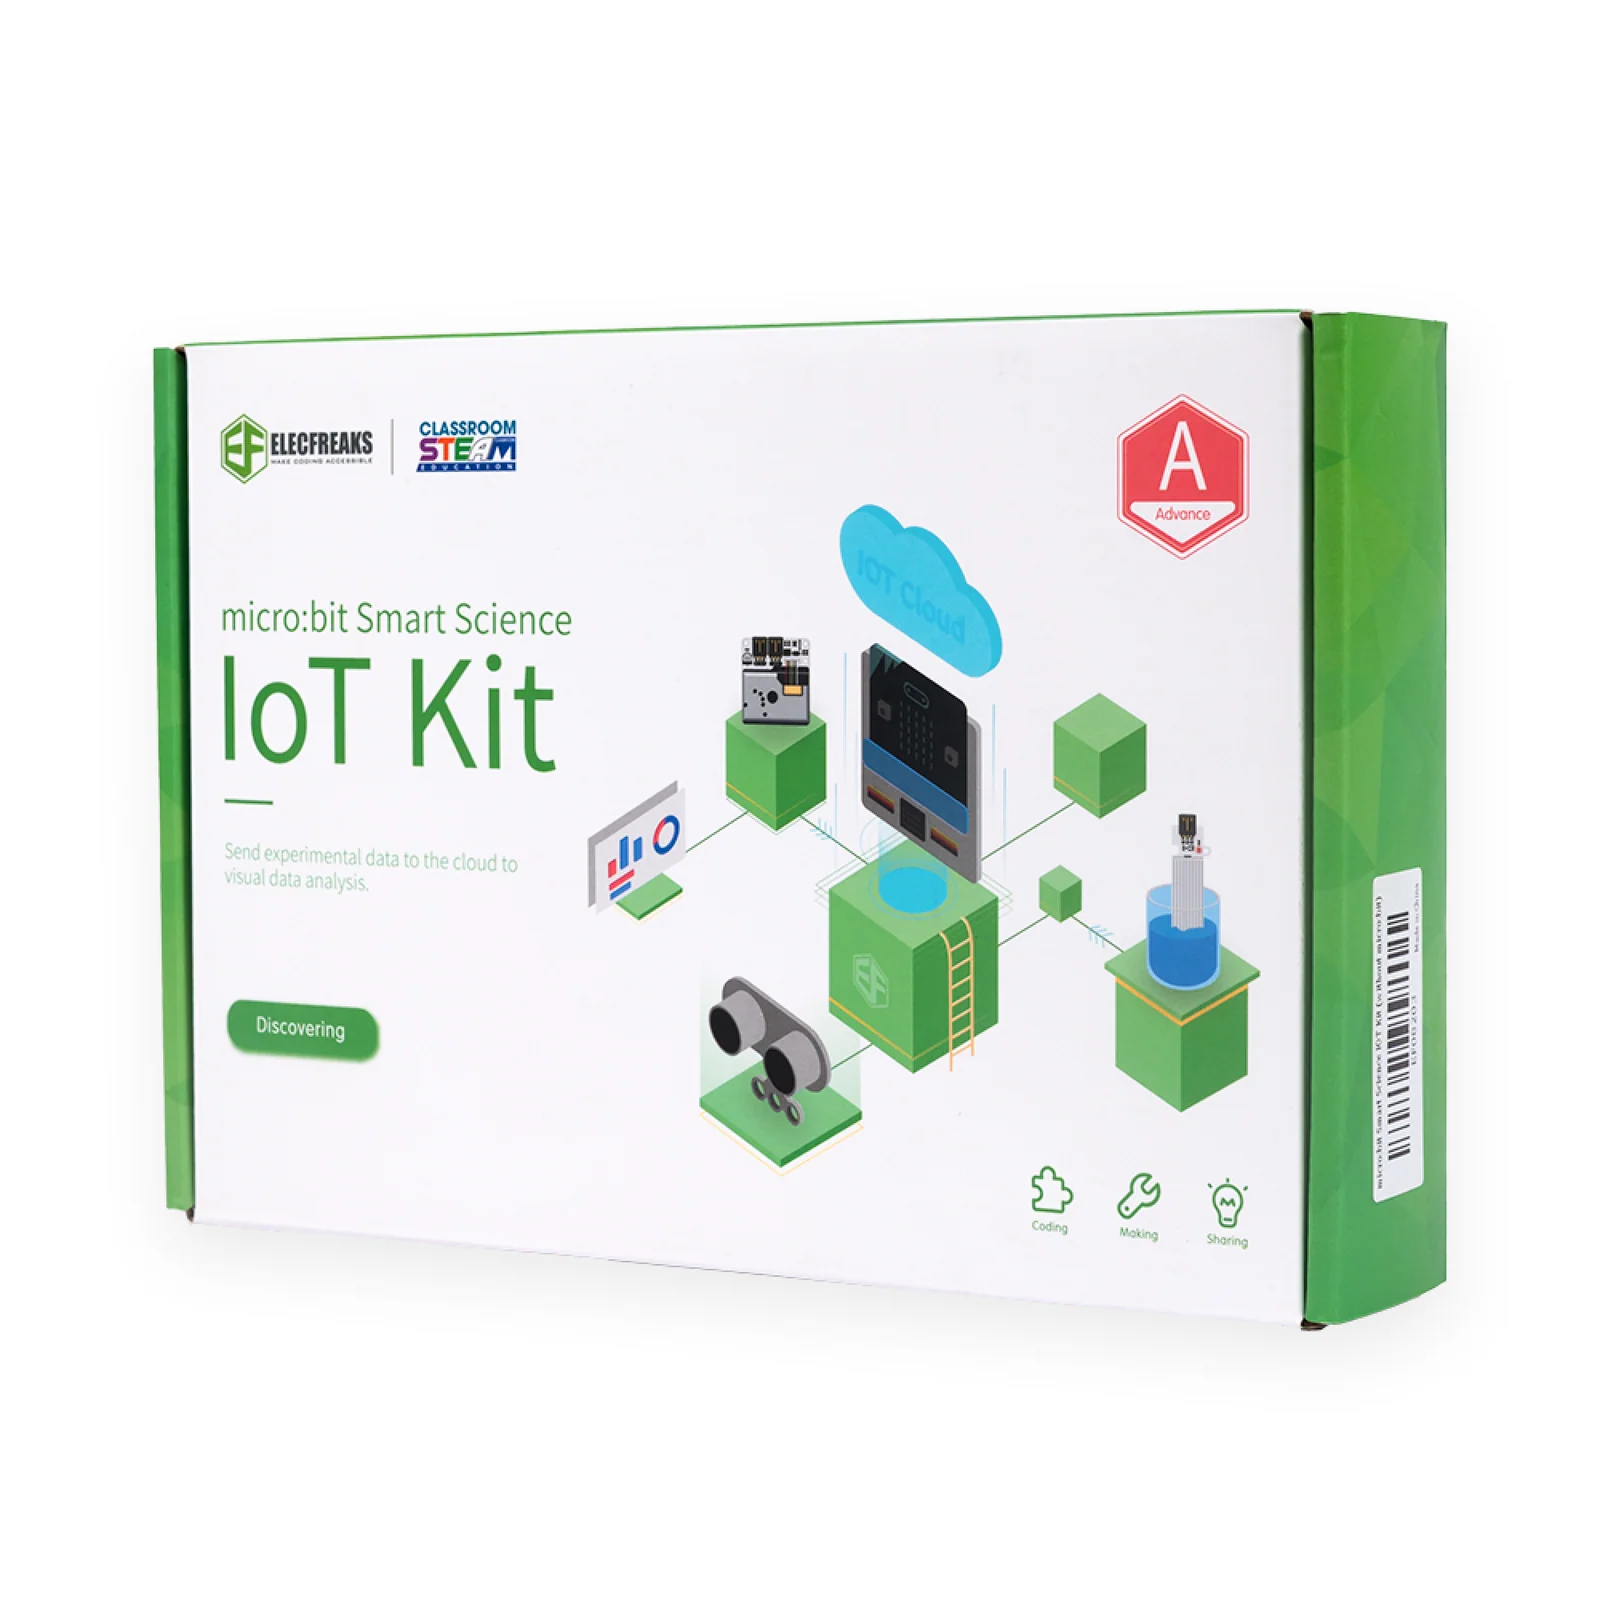
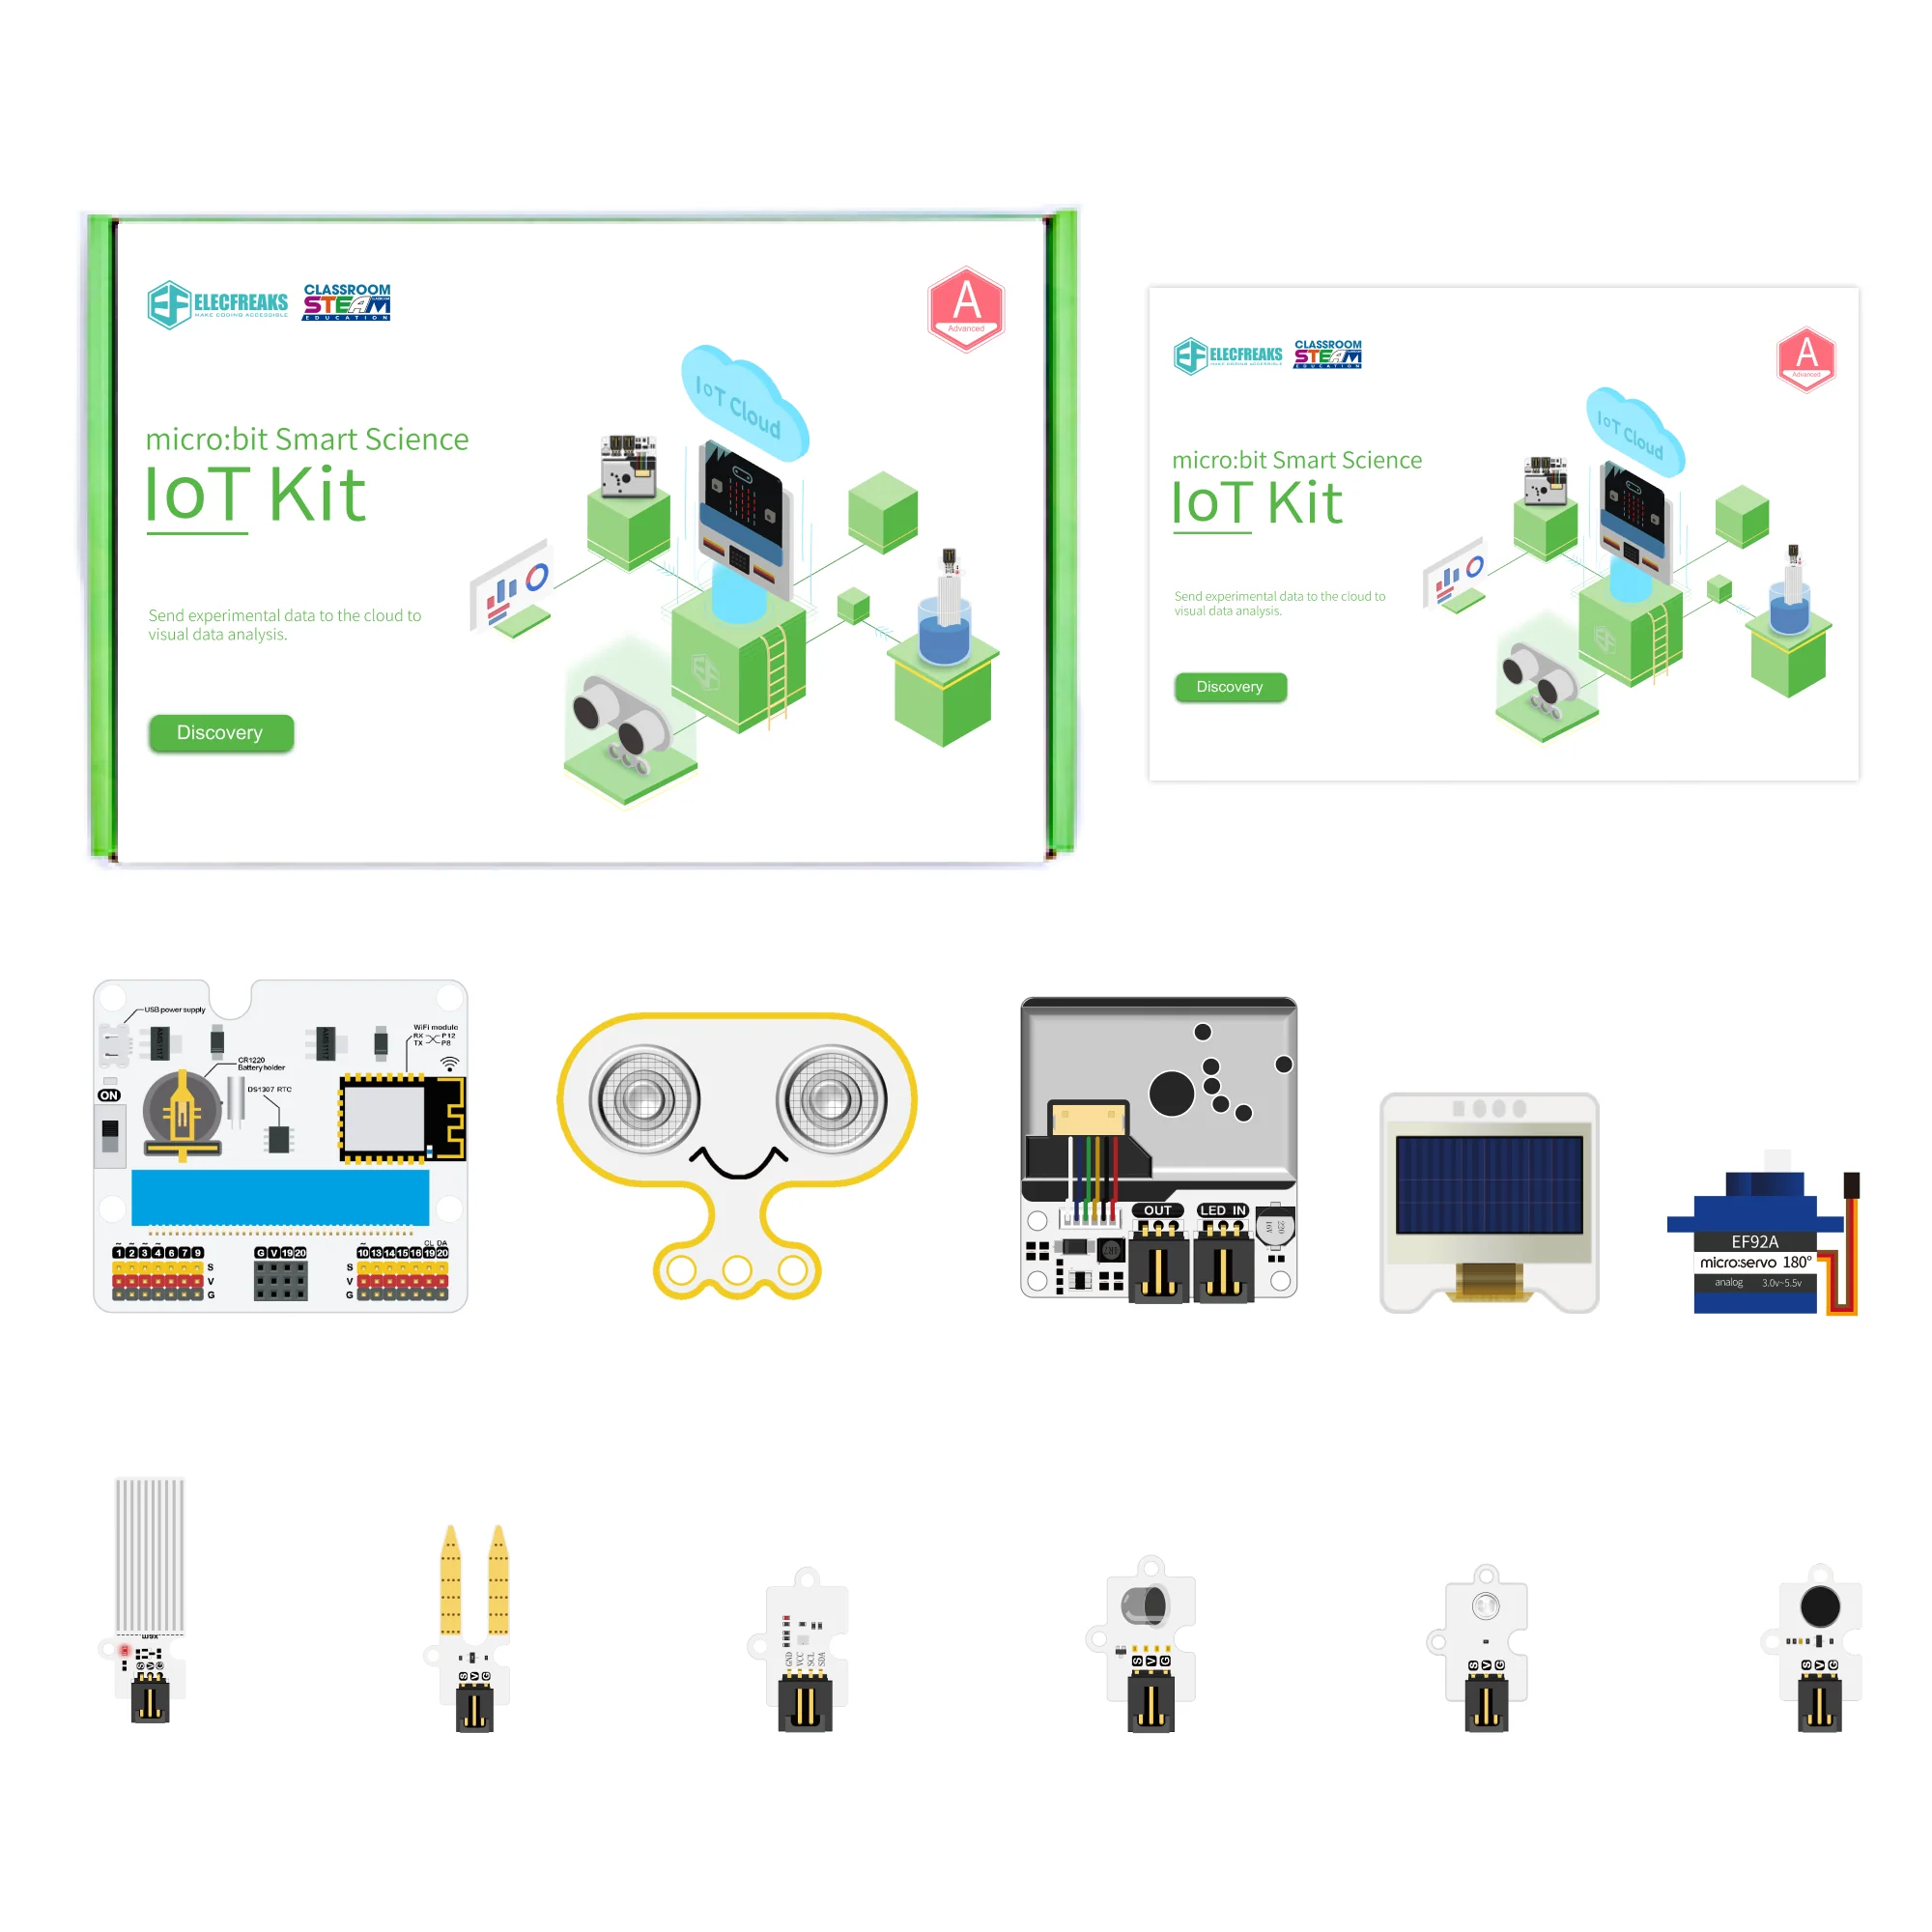
micro:bit
Smart Science
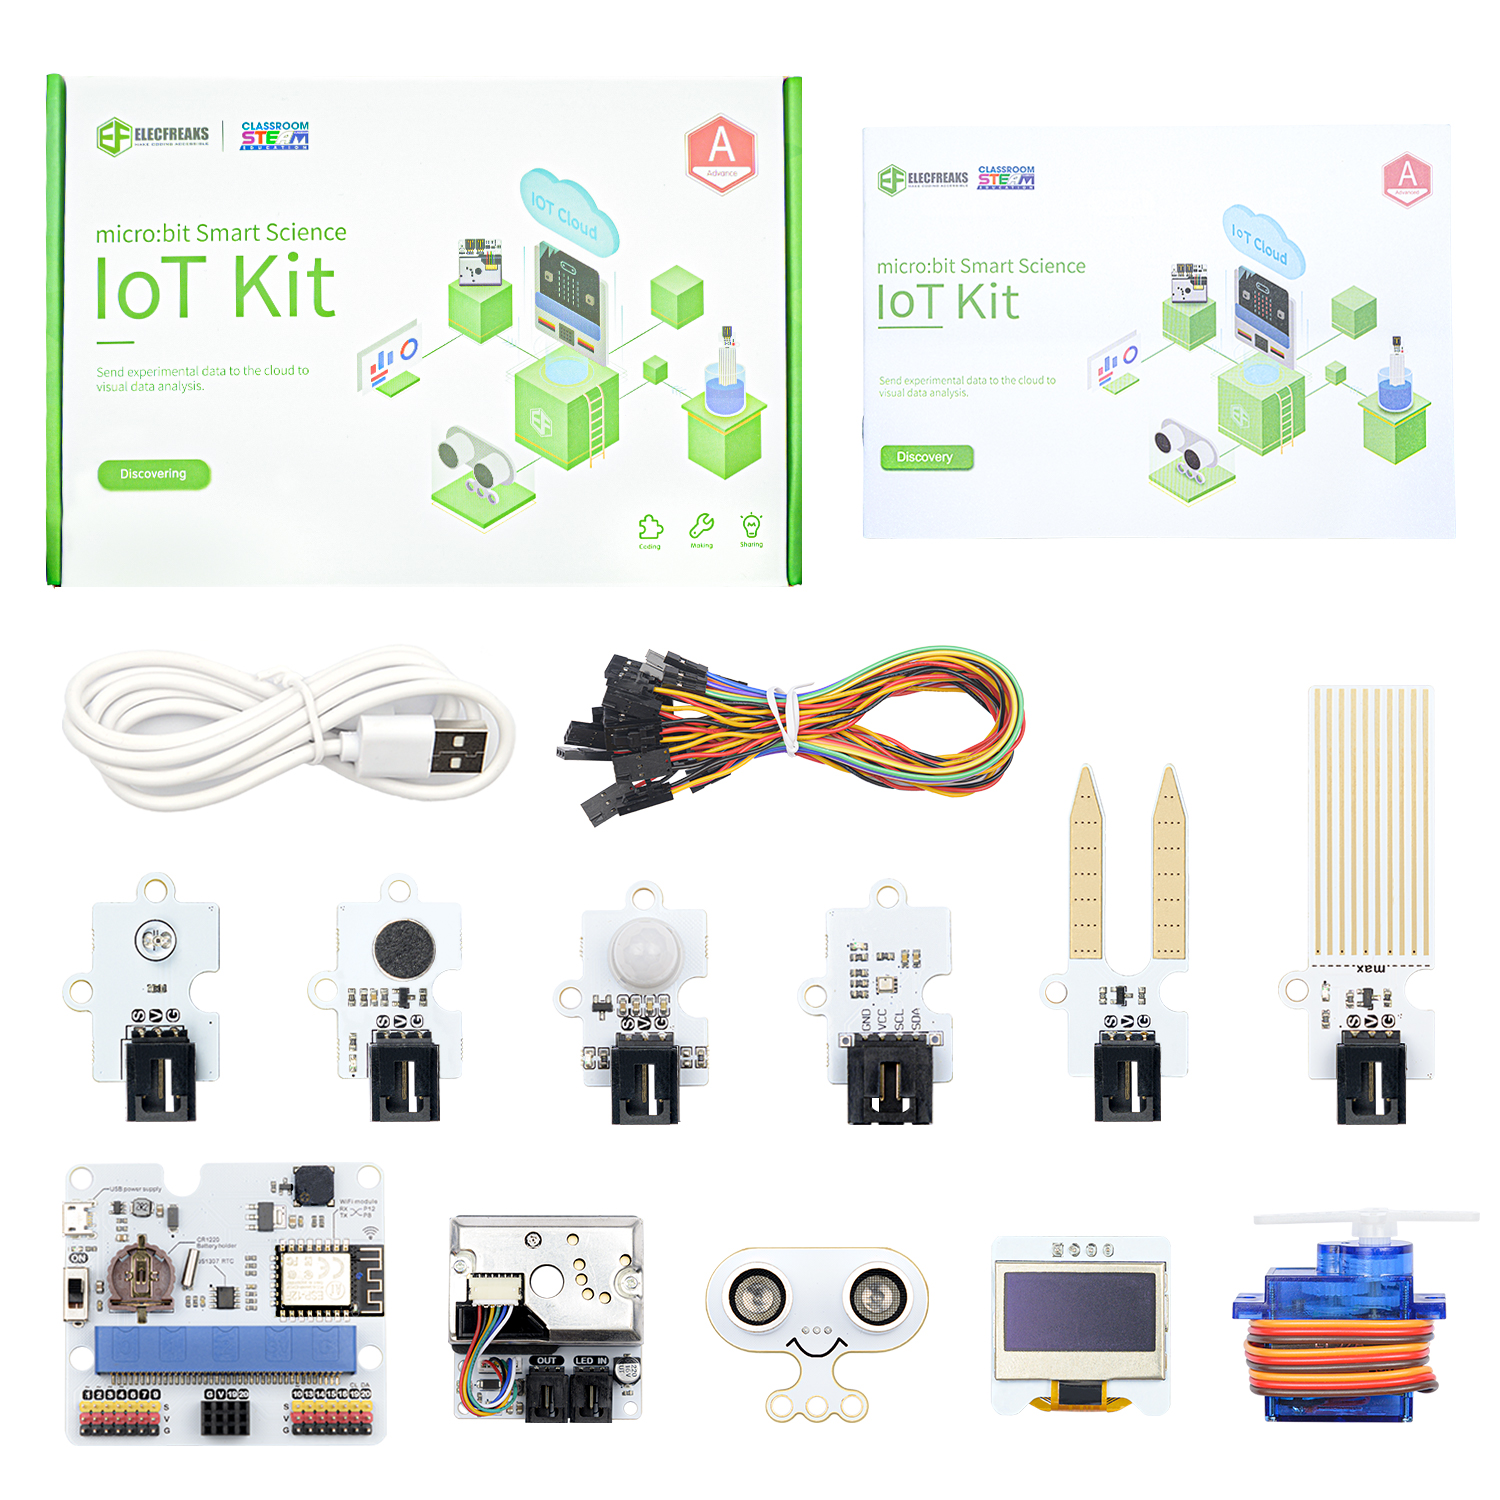
IoT Kit
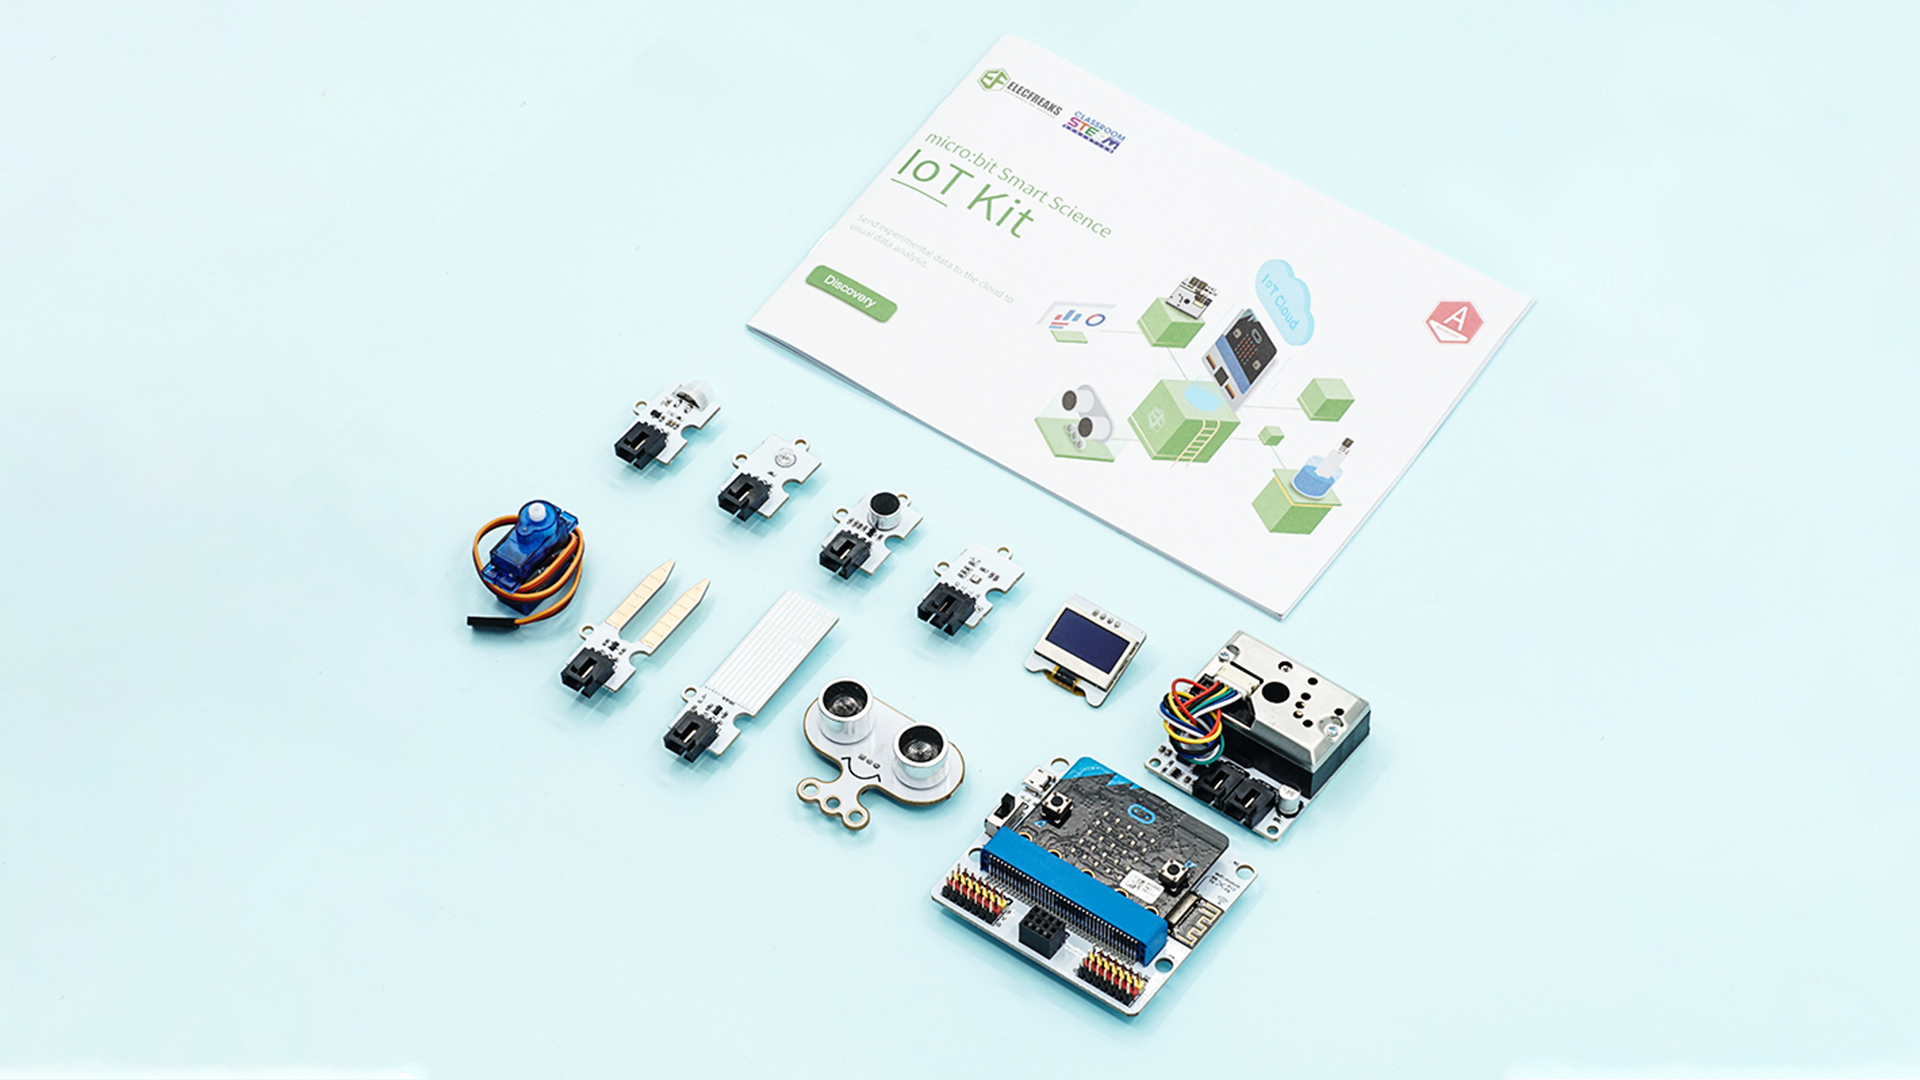
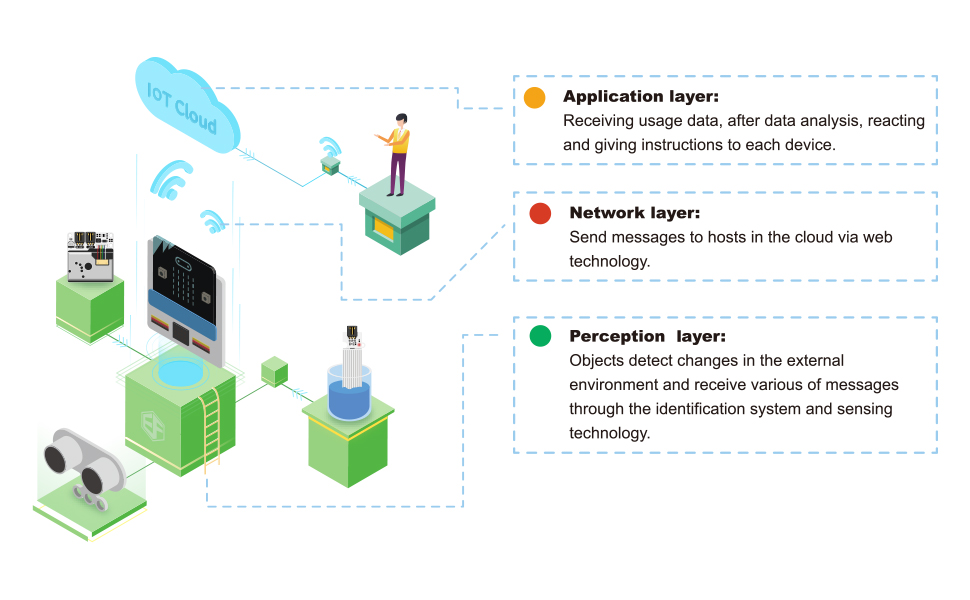
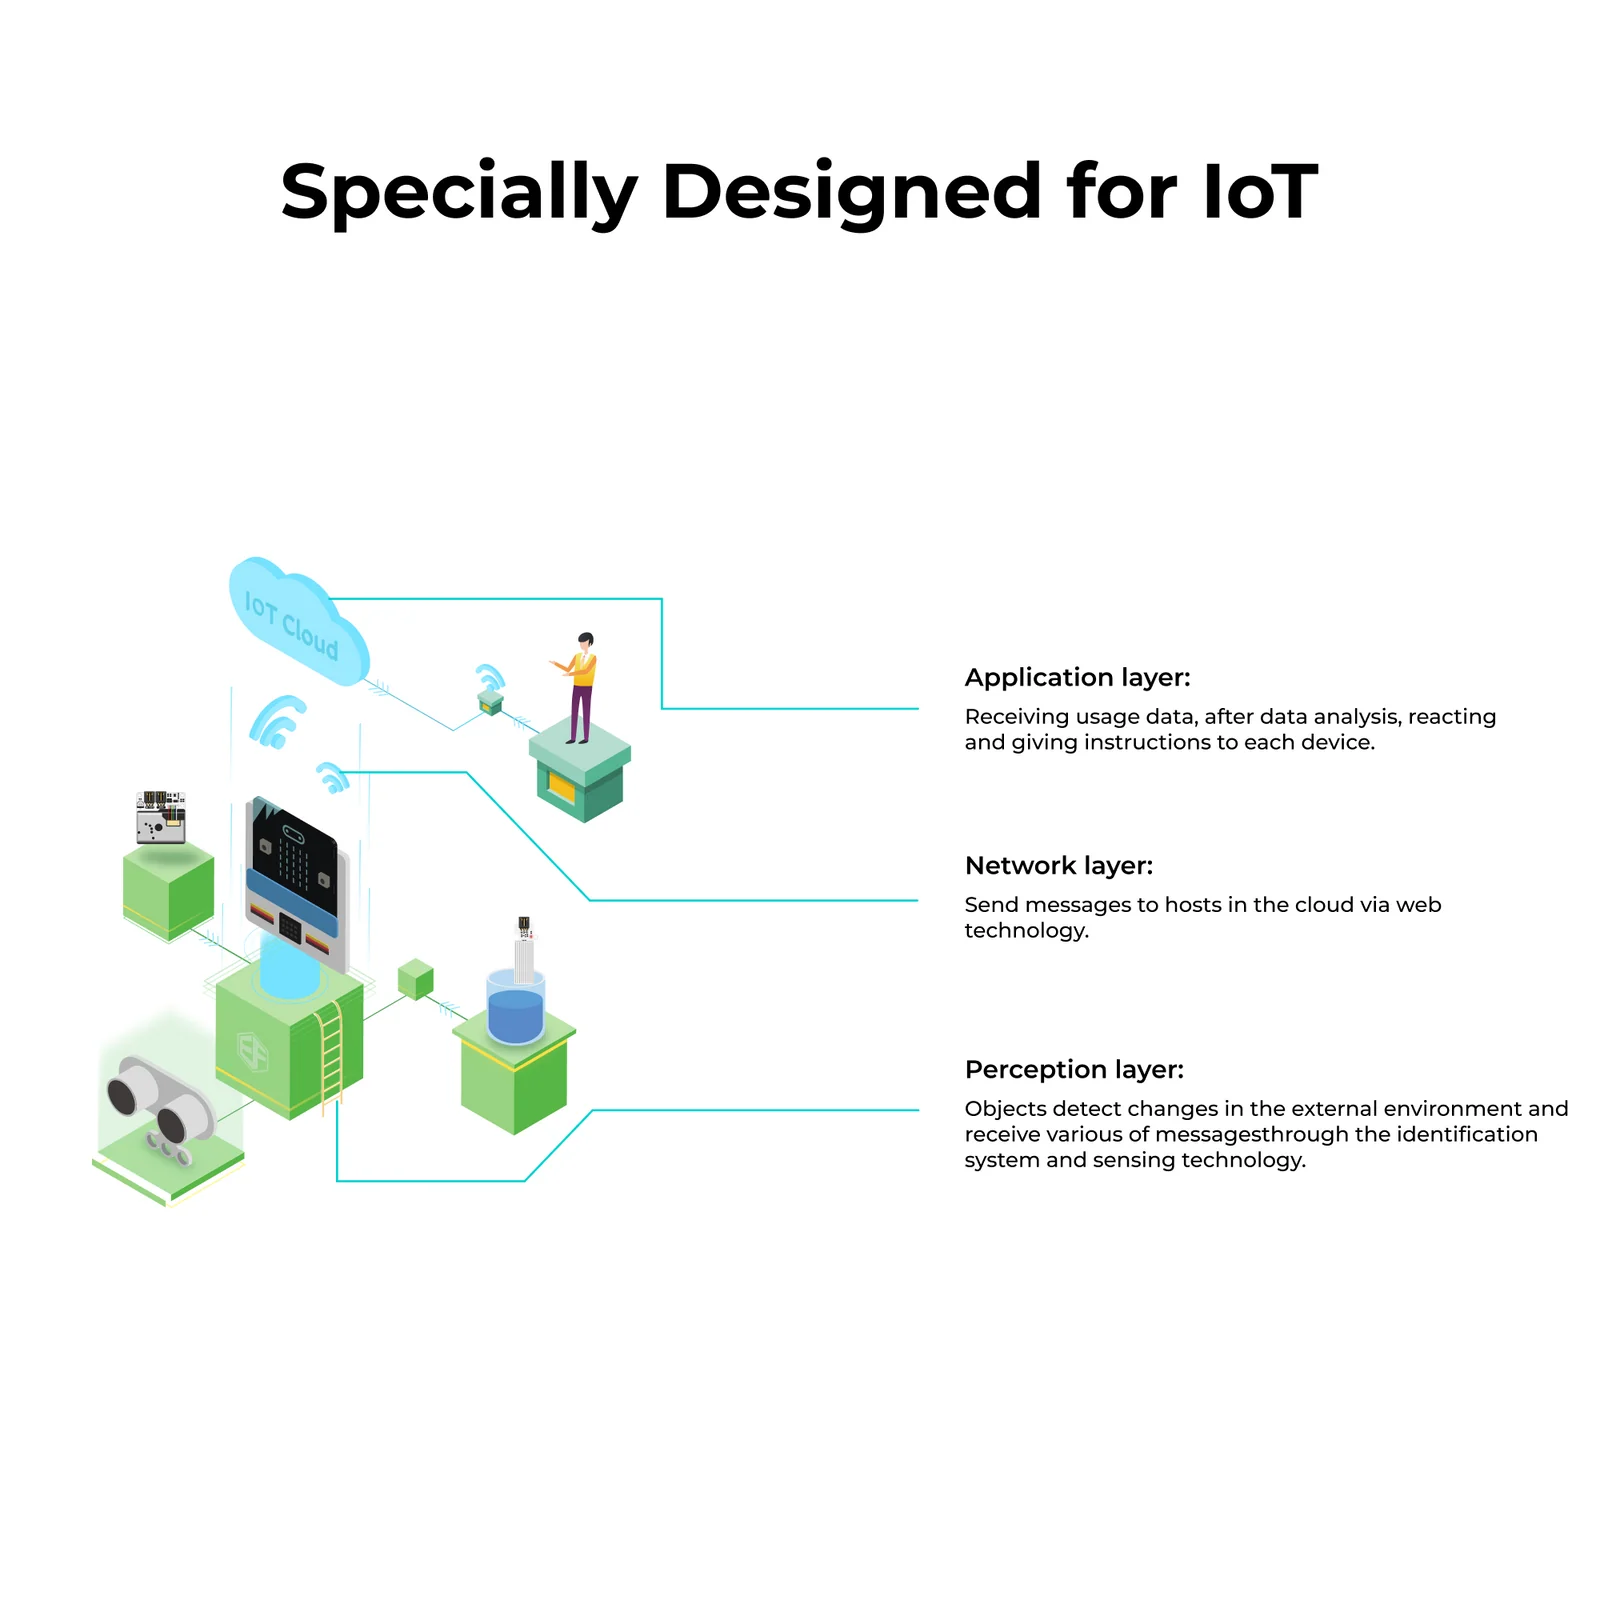
Connect the physical world to the cloud. Students collect real environmental data using professional-grade sensors, upload it to IoT platforms, and build automated systems — mastering the full data science pipeline from sensor to insight.
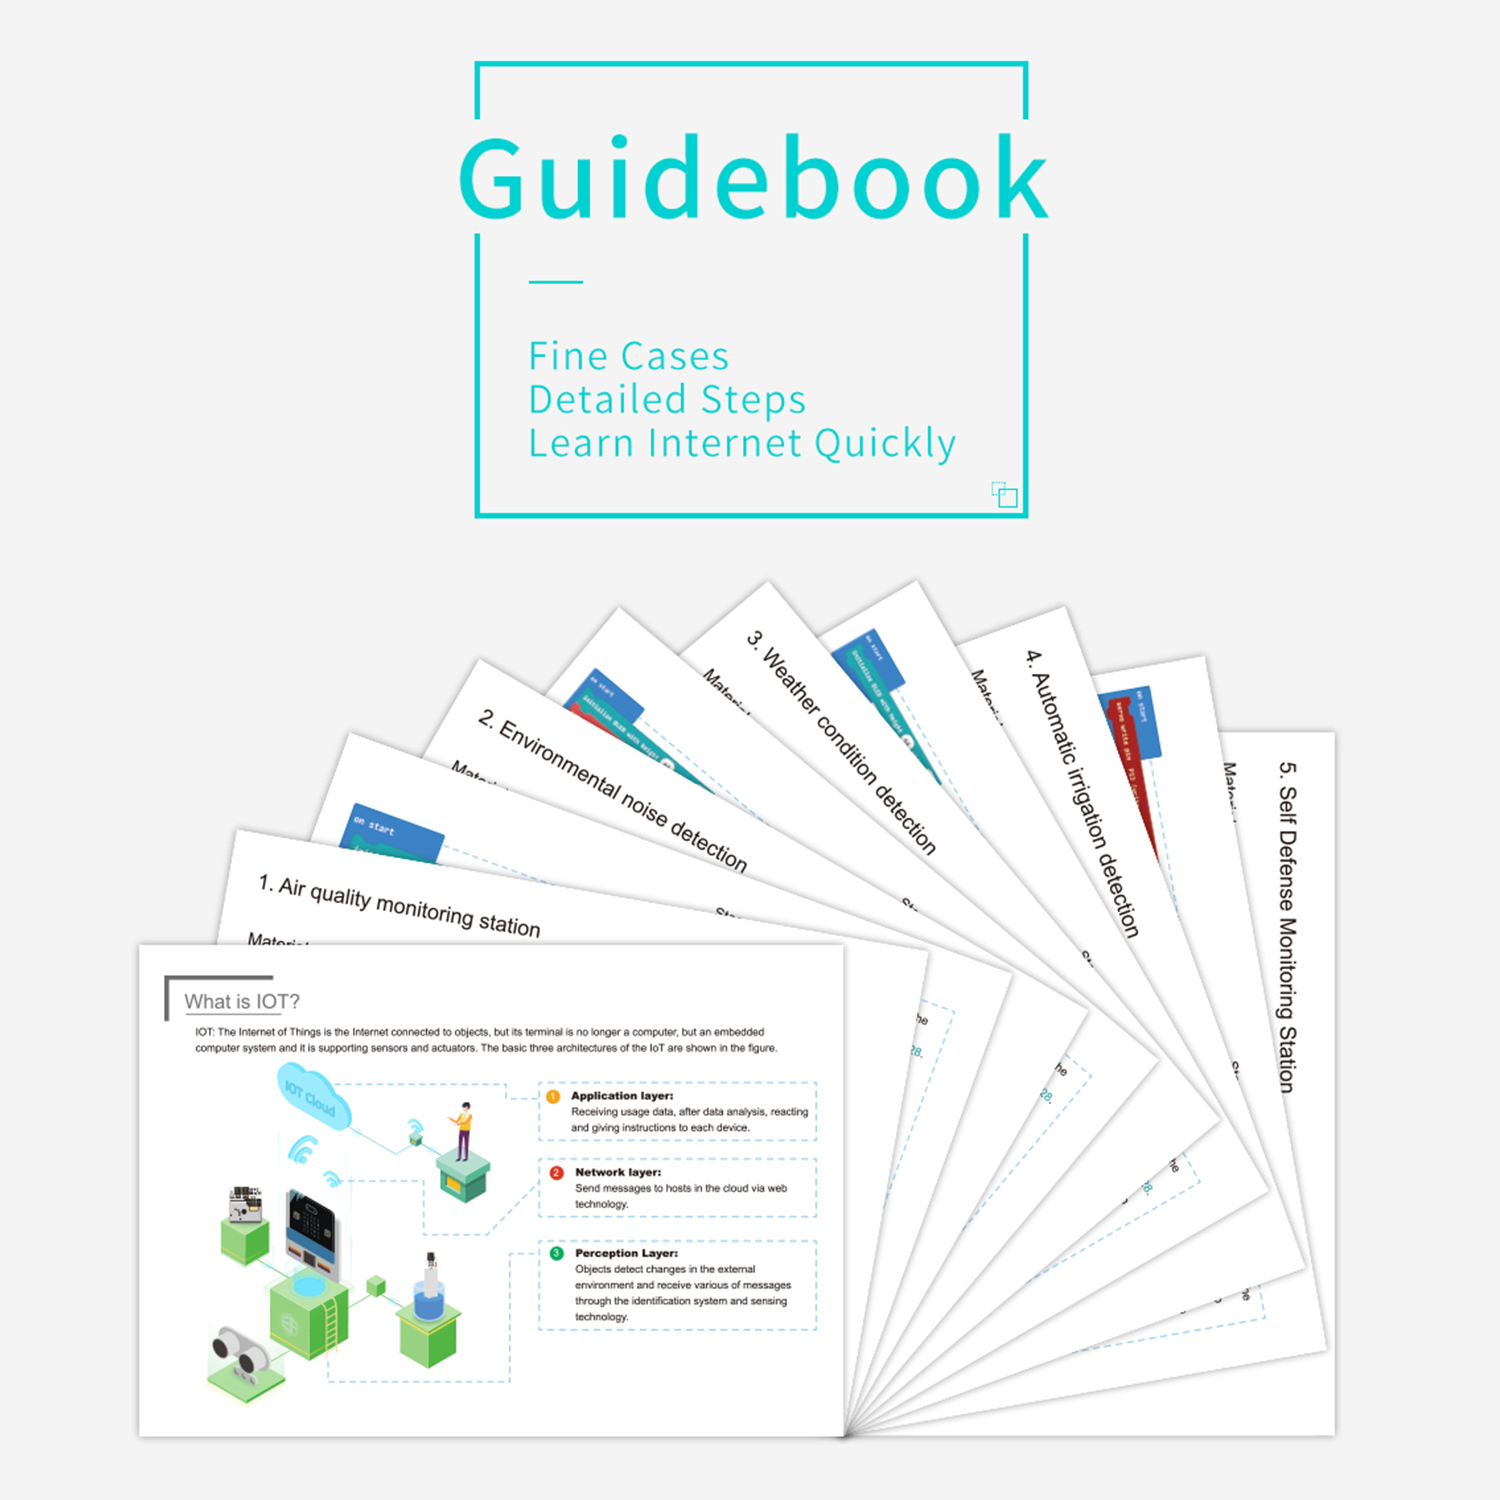
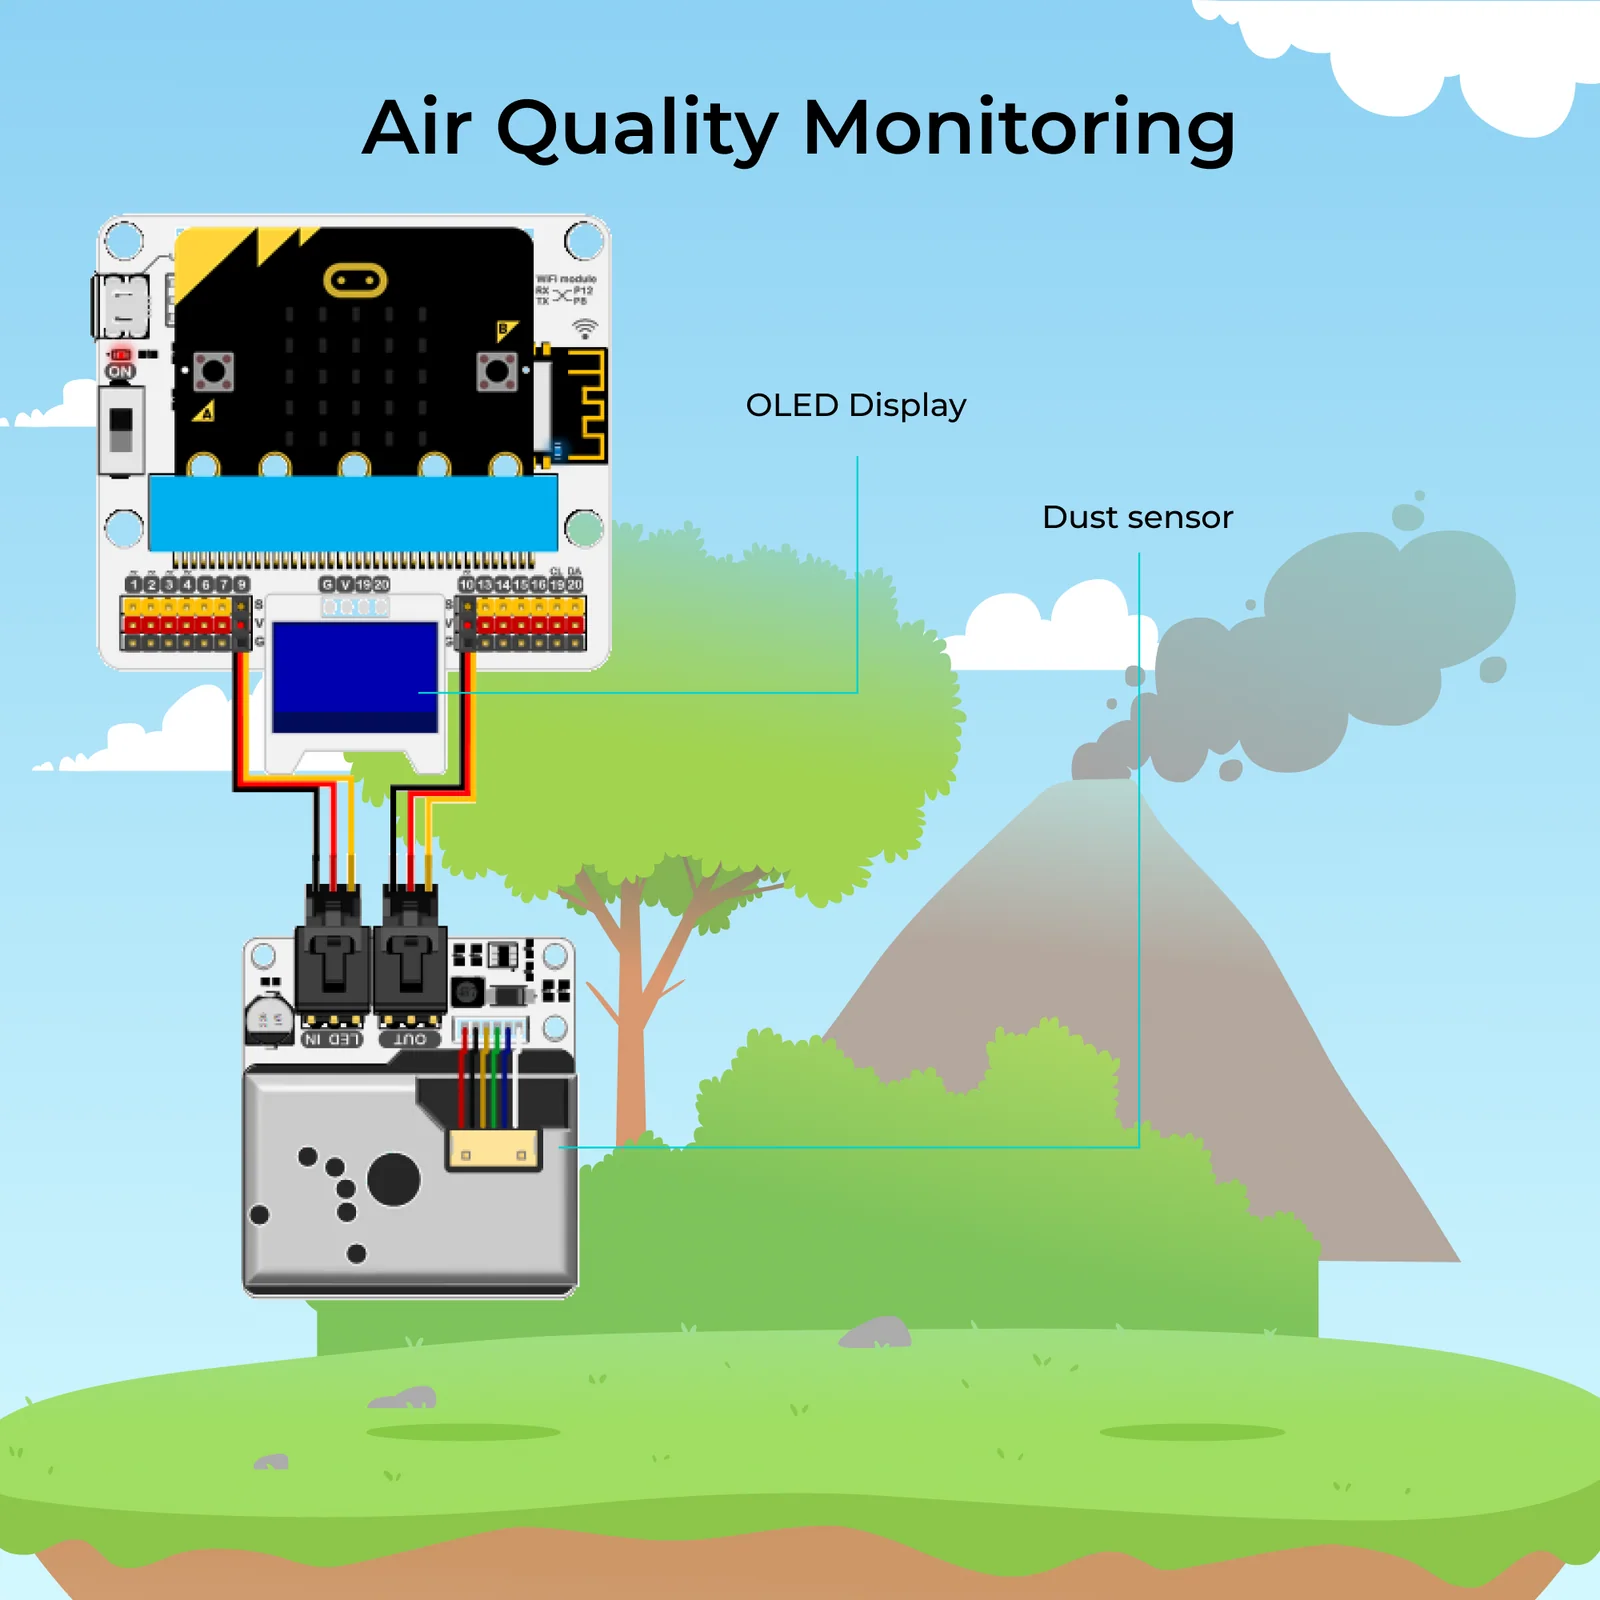
🌎 5 Real-World IoT Projects
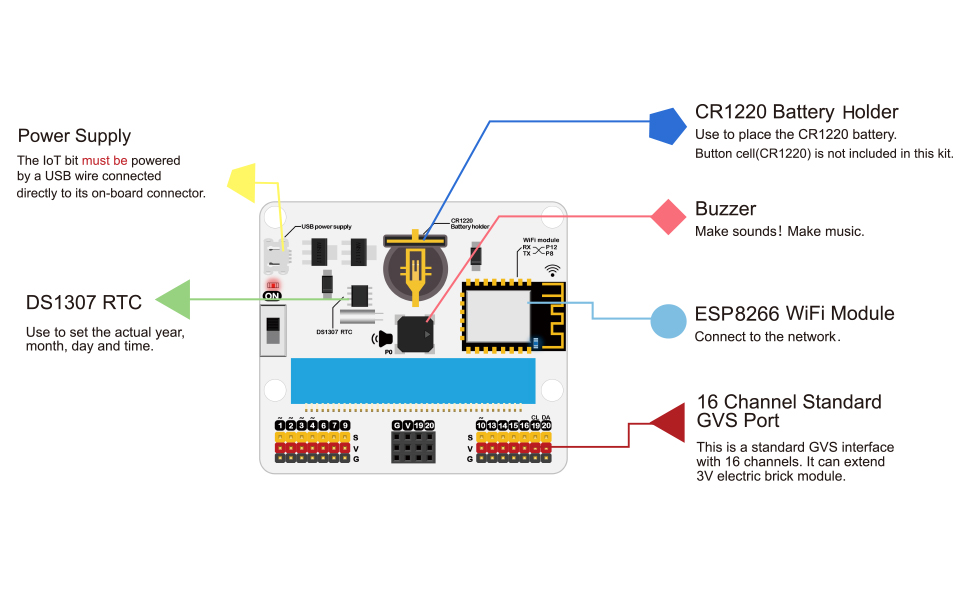
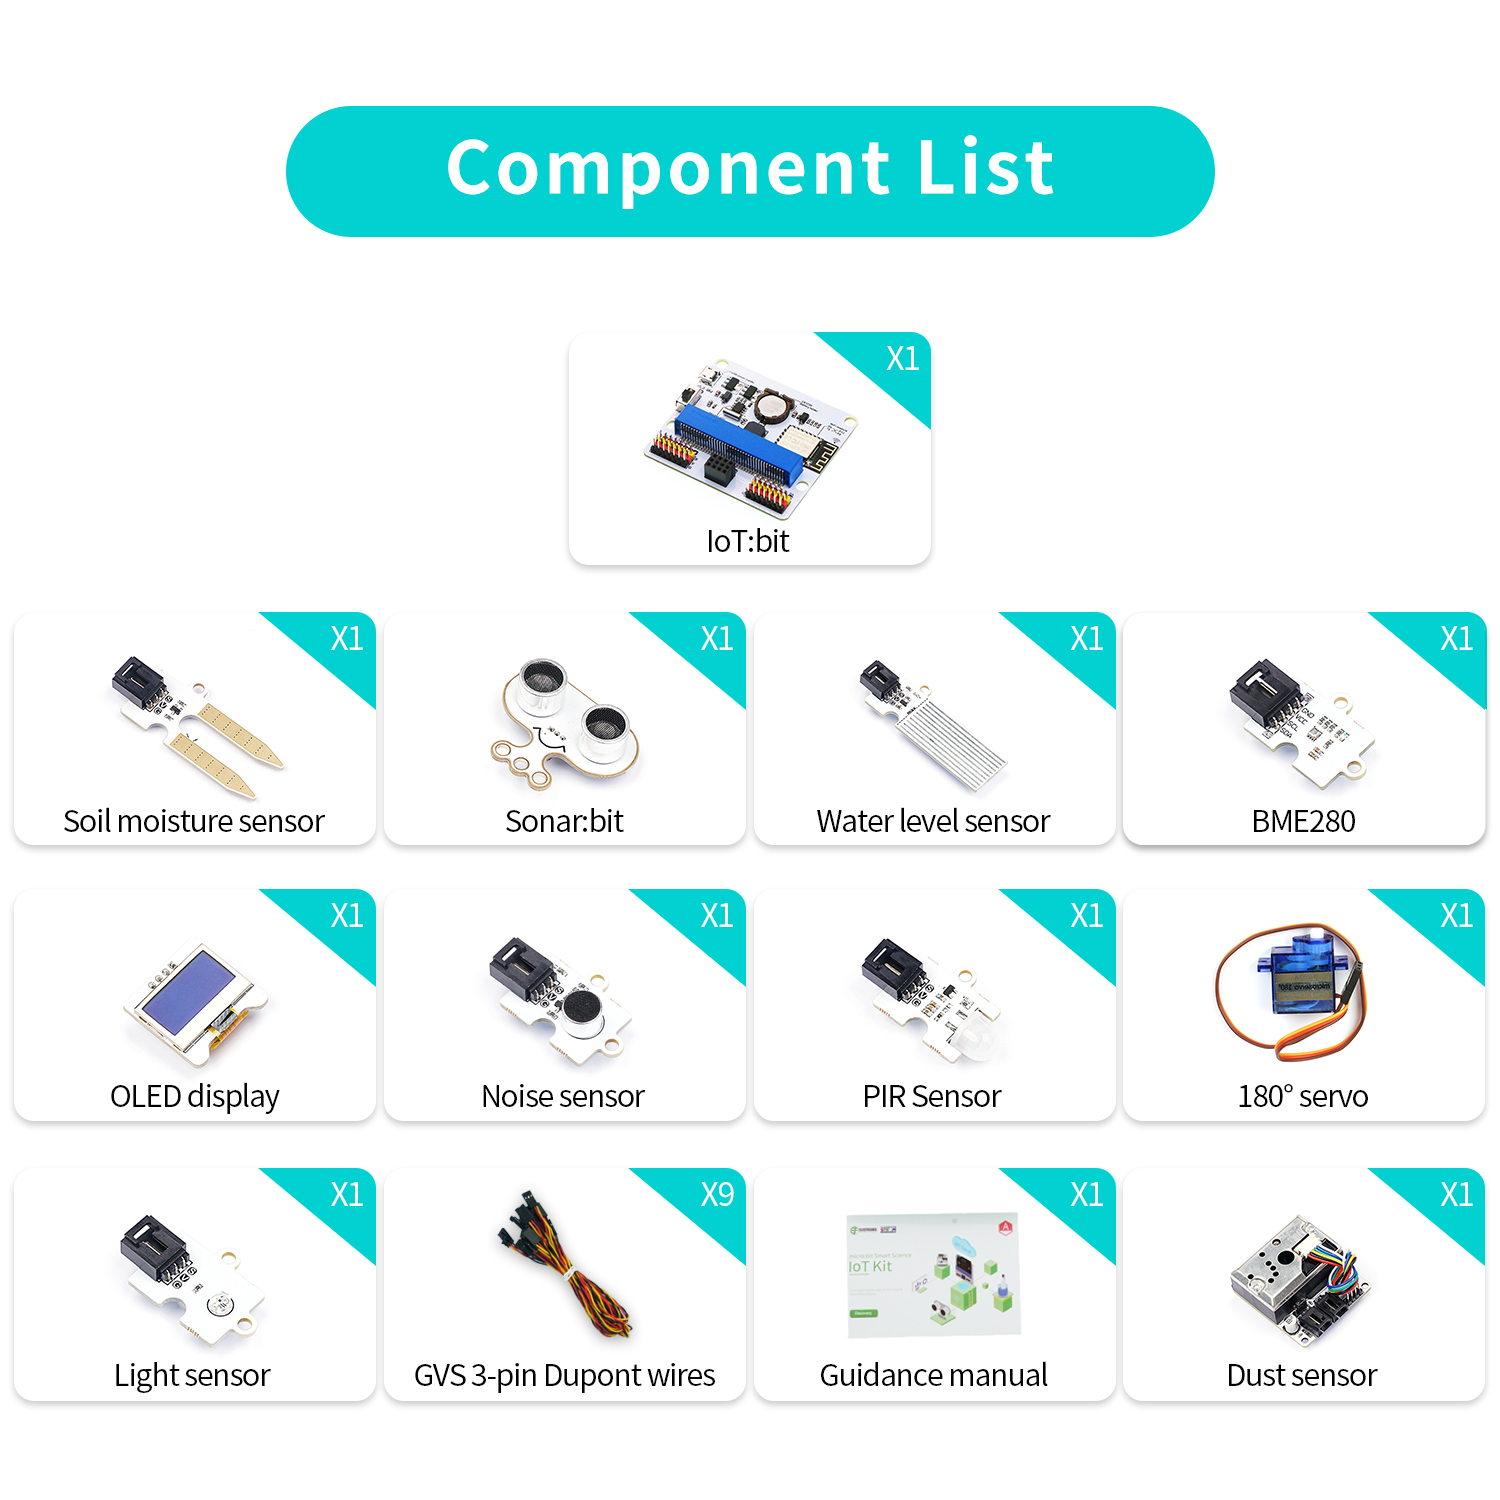
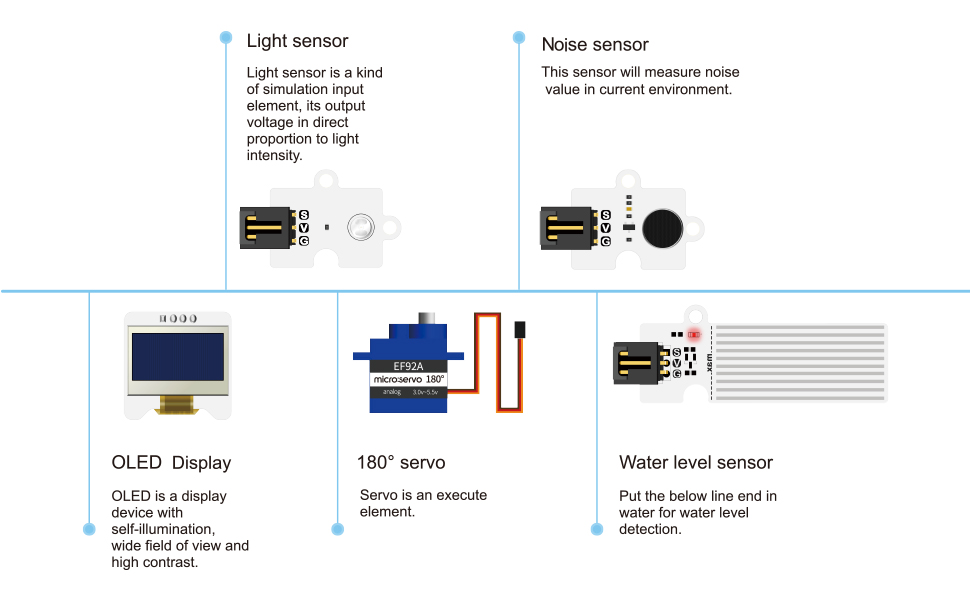
🔌 12 Sensors & Modules
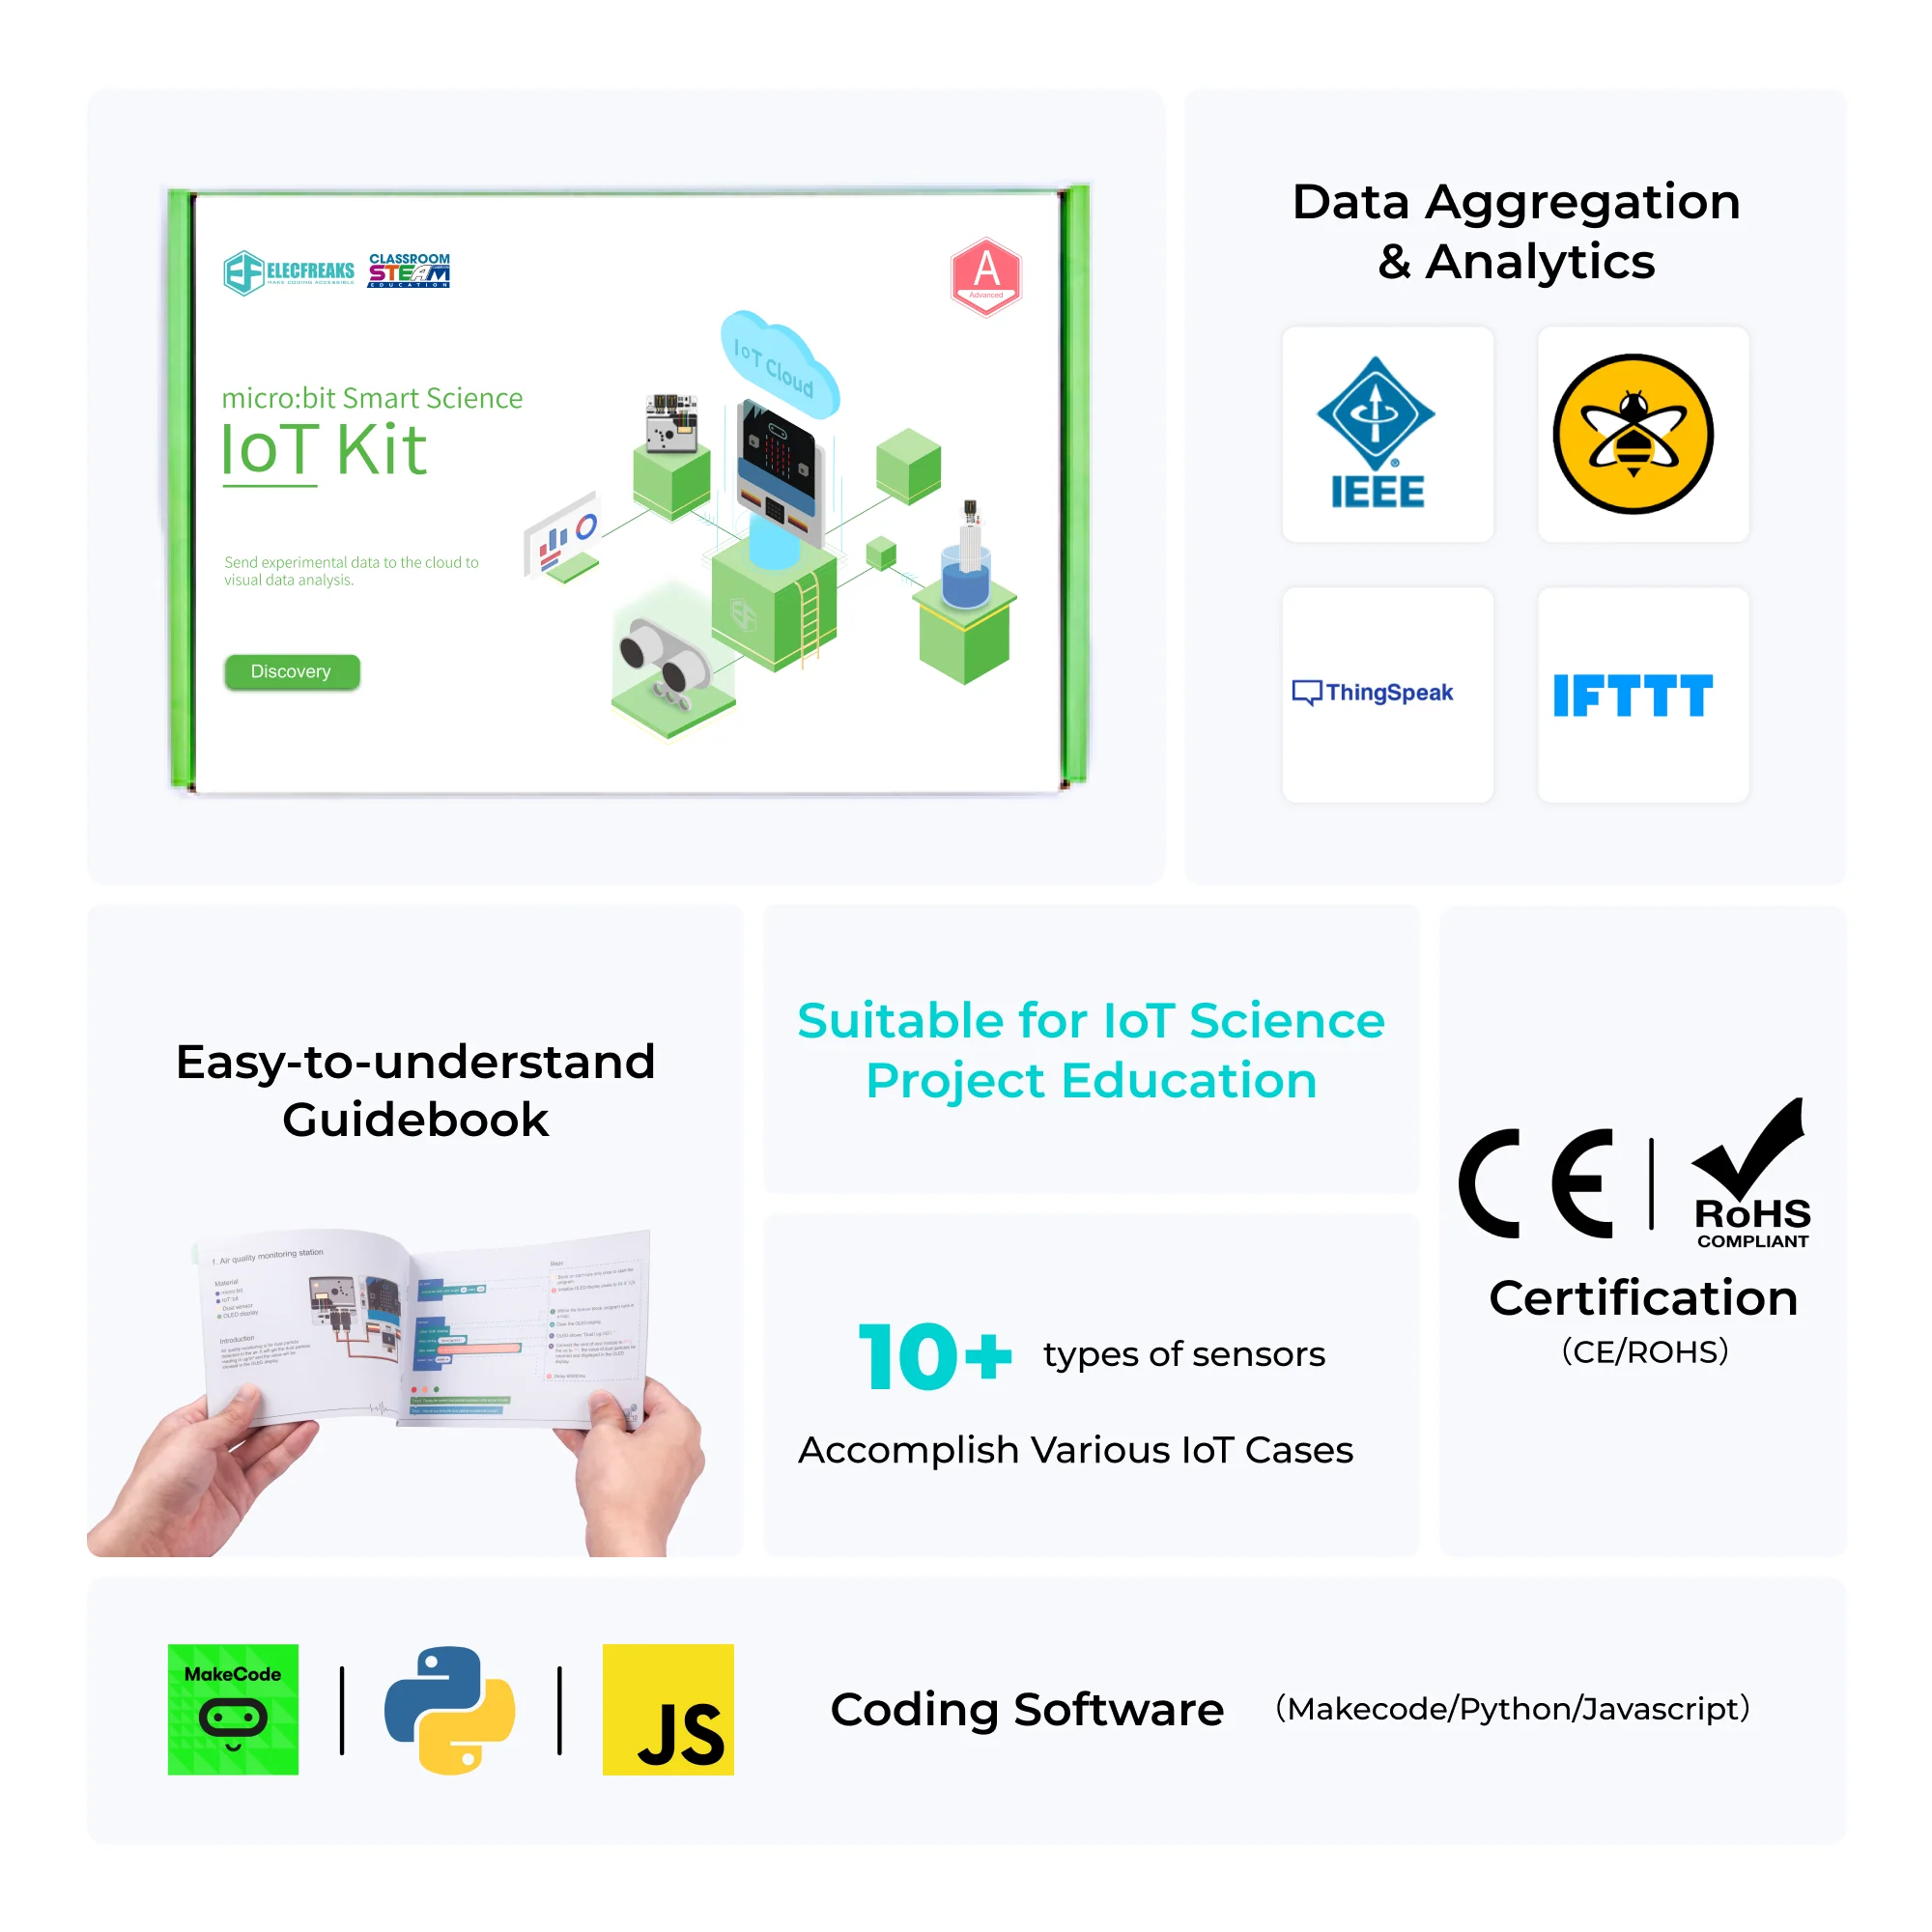
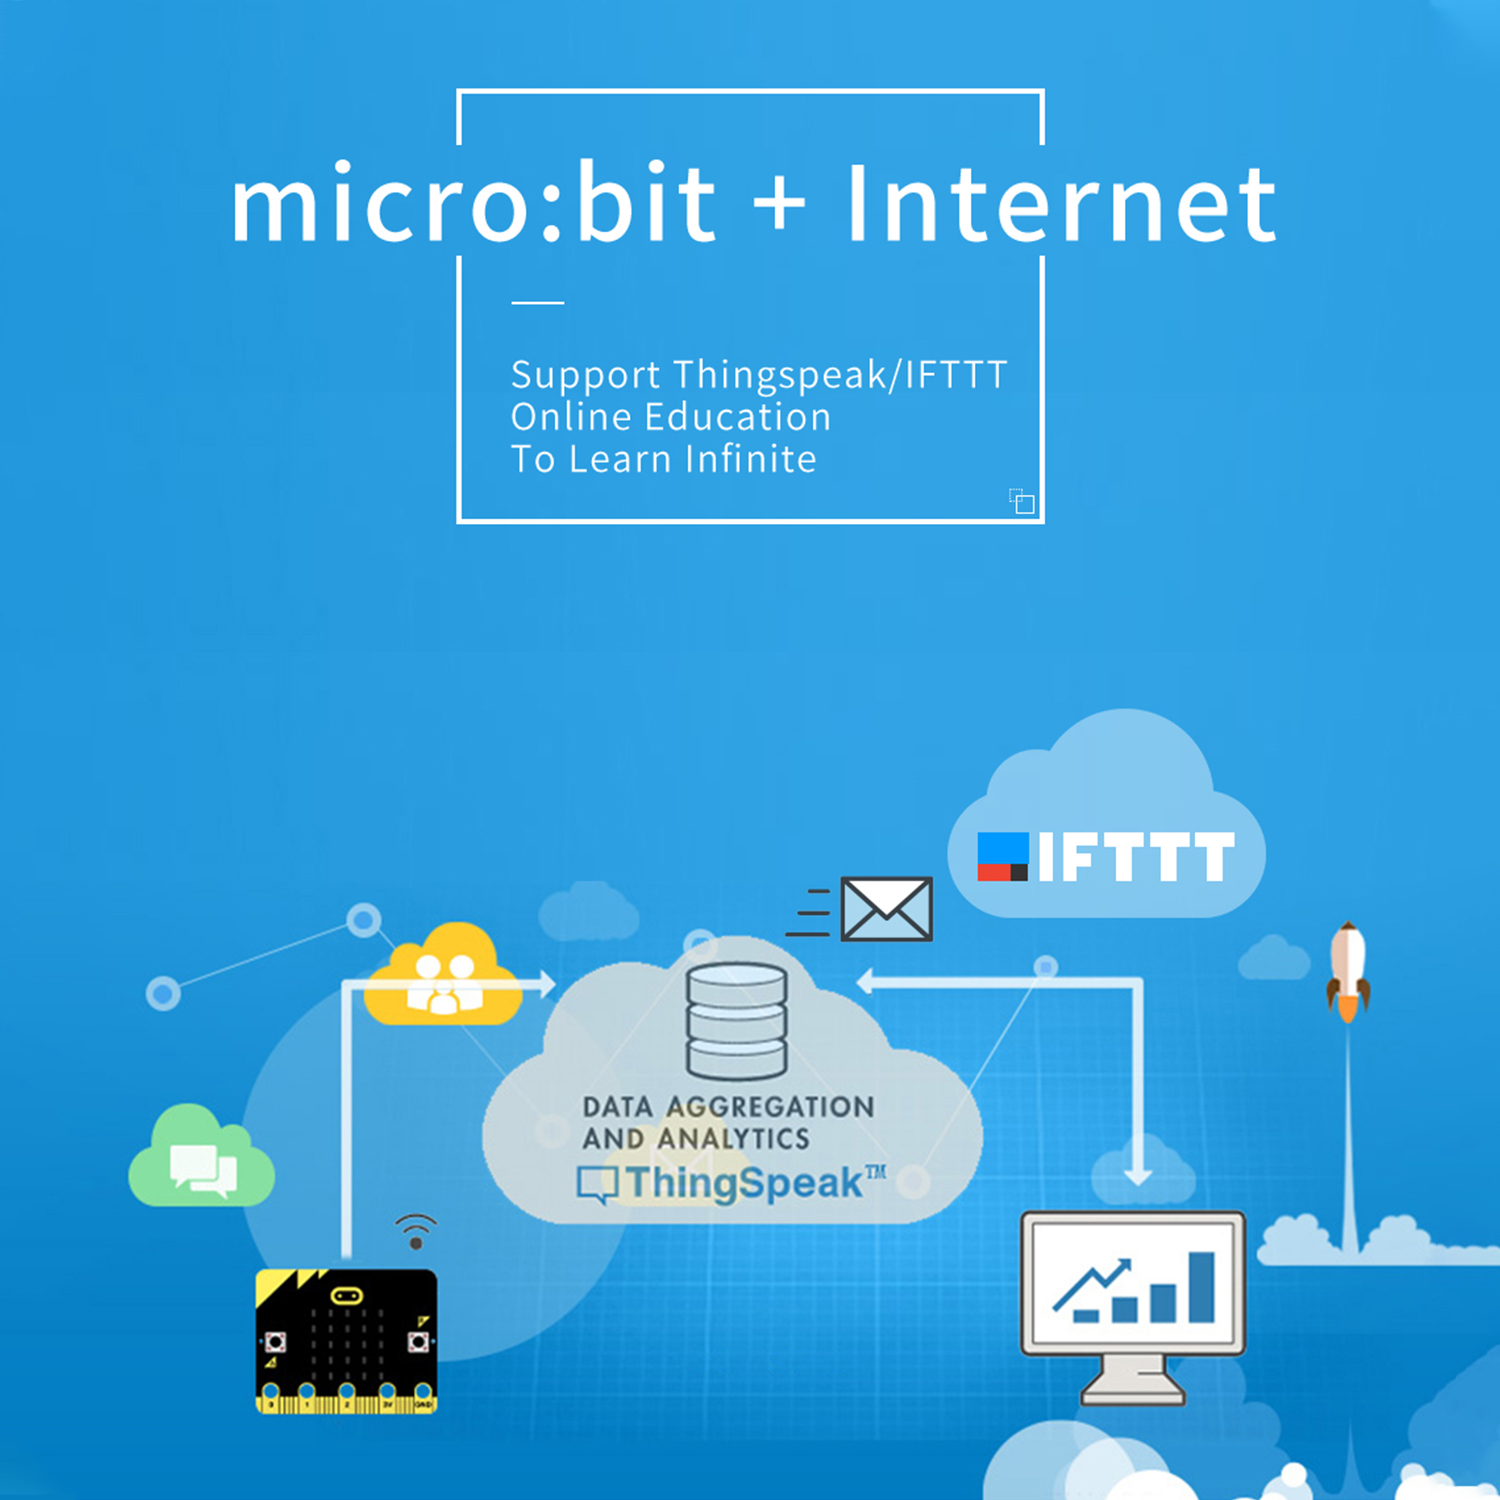
☁️ 4 Cloud Platforms
📈 Live Data Visualization
🎓 Grades 6–10
Request a Quote →
5
IoT Cases
12+
Sensors
4
Platforms